Use Your Keypad
Navigate the User Menu
Command (CMD)
Use CMD to move forward through each section of the user menu. You can also press CMD to save information you have just entered.
Back Arrow
Use the back arrow to back up one step while in the user menu. You can also press the back arrow once to erase the last character you entered.
Select Areas
Your keypad has a top row of select areas. Each time you press a select area, the keypad displays a function or series of options.
When there are more than four options available, press CMD to display the remaining options. Pressing the back arrow allows you to review the previous four choices.
Thinline Keypads

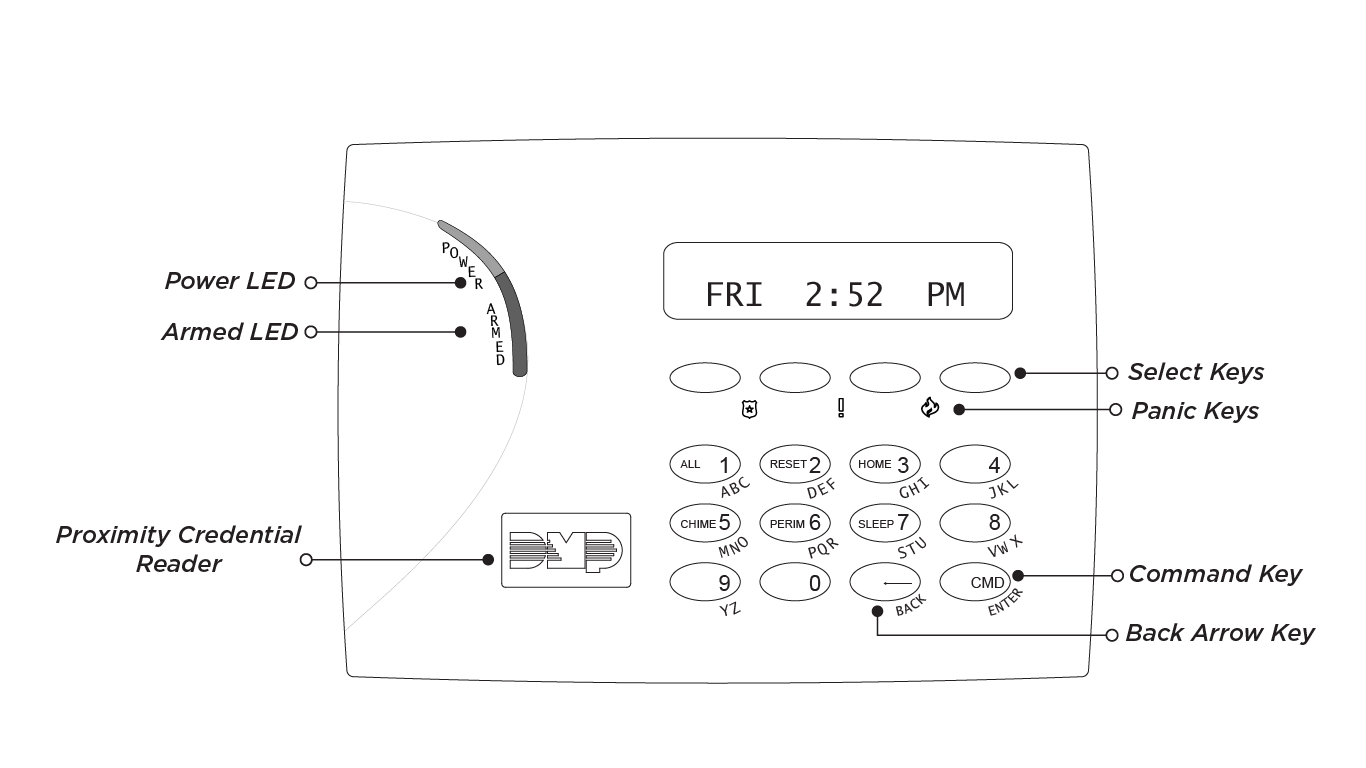
7000 Series Thinline Keypad

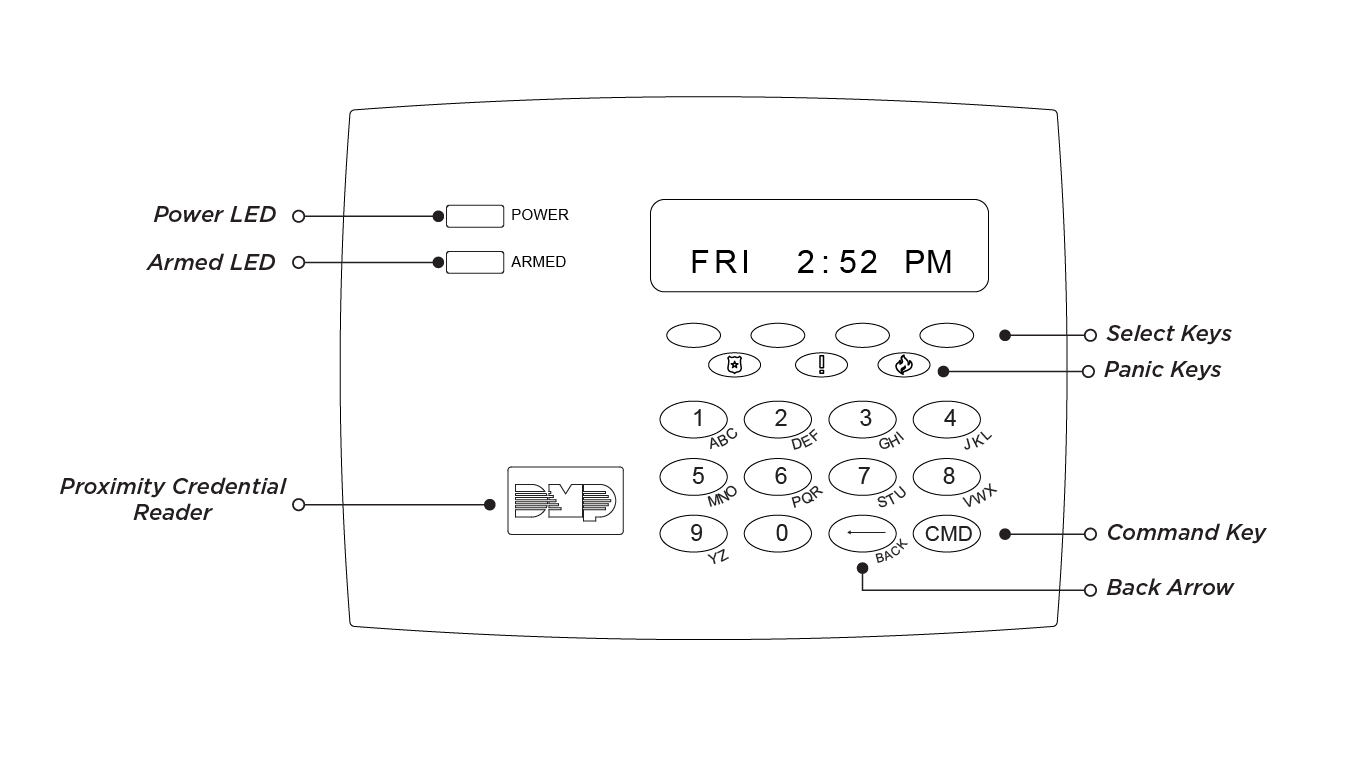
7100 Series Thinline Keypad
Options
On Thinline Keypads, press and hold the CMD and back arrow keys at the same time to access the Options Menu.
Proximity Card Reader
The keypad may have a built-in proximity card reader that allows you to arm or disarm your system when you present a credential.
Power and Armed LEDs
The AC Power and Armed LEDs indicate your system’s power and armed status.
Select Keys
Use the select keys to type and navigate in the keypad.
Touchscreen Keypads

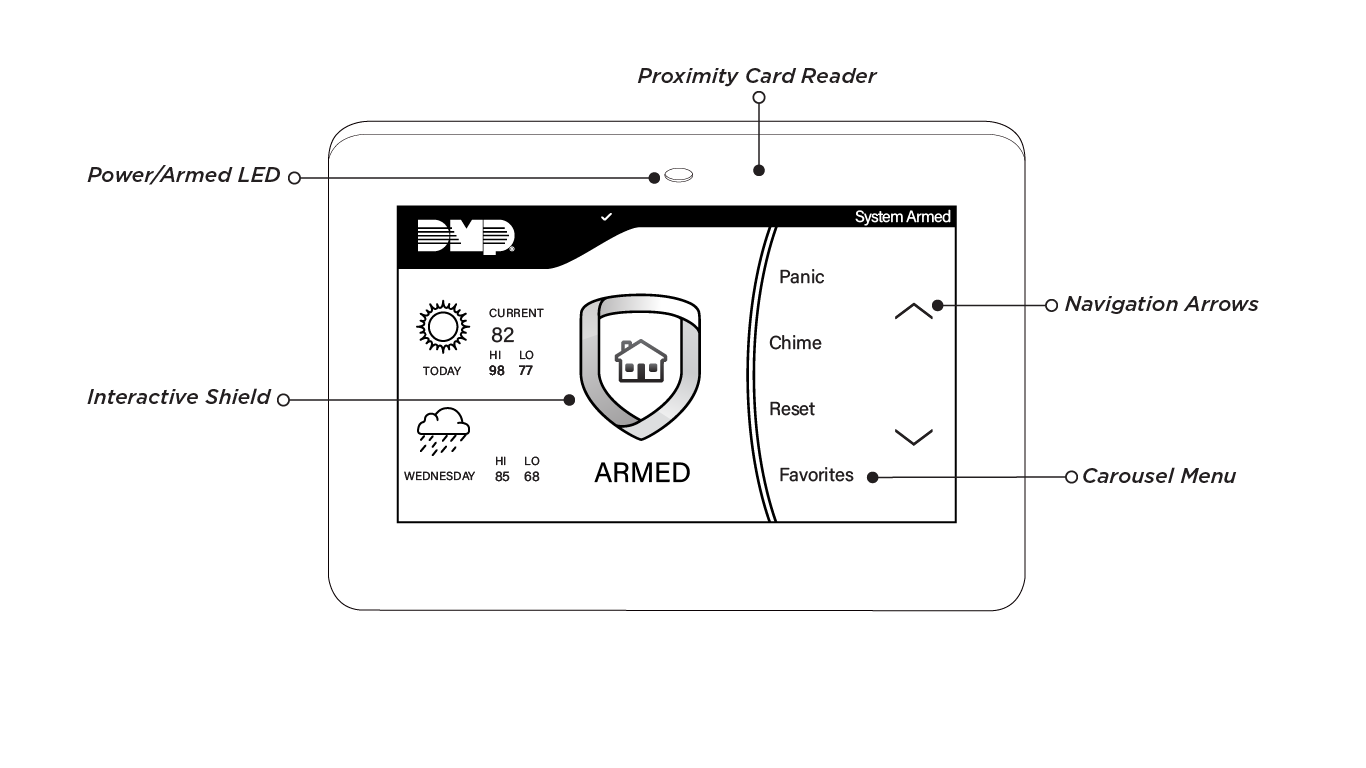
7800 Series Touchscreen Keypad

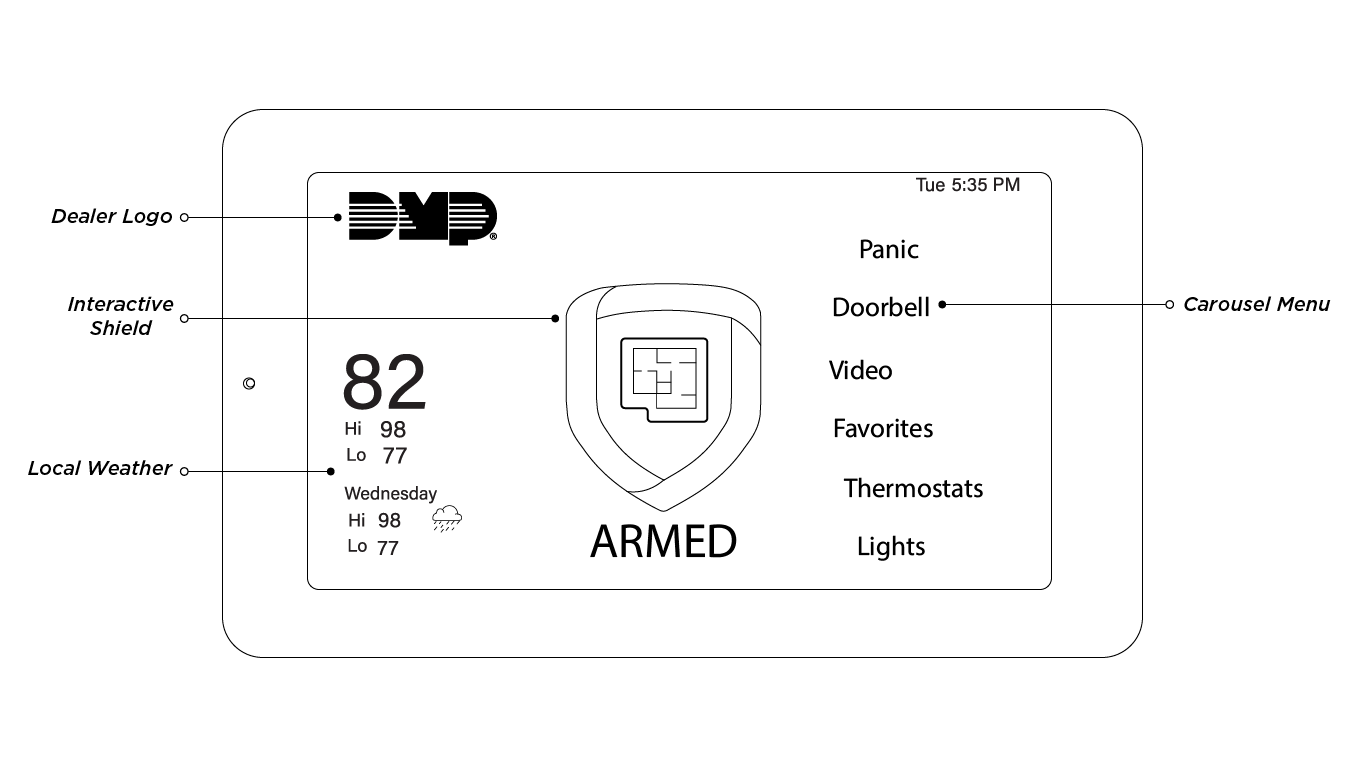
8860 Series Touchscreen Keypad
Options
On Touchscreen Keypads, press Options in the Carousel menu. From here, you can adjust the keypad brightness, tone, and volume.
If the keypad brightness is set to 0, the keypad and LED will turn off when not in use. Brightness level 1 turns off the keypad when not in use, but the LED remains on.
Weather
Your system has been programmed to provide local weather information based on your zip code. Current weather conditions and forecasted HI and LOW temperatures are available on the home screen.
Security Provider Logo
Press the logo at the top of the keypad to bring up your security provider’s contact information.
Proximity Card Reader (5-Inch Only)
Your keypad provides a built-in proximity card reader located to the right of the power/armed LED. Present your proximity card or keyfob here to disarm your system.
Power and Armed LEDs (5-Inch Only)
The LED at the top-center of the keypad indicates the keypad’s power status and your system’s arming status. Depending on the status, the LED will be red or blue. See the table below for more information.
Color and Activity | Armed Status | Keypad Power Status |
|---|---|---|
Blue Steady | Disarmed | AC Power OK, Battery OK |
Blue Blinking | Disarmed | AC Power OK, Battery Trouble |
No Light | Disarmed | AC Power Trouble, Battery OK |
Red Steady | Armed | AC Power OK, Battery OK |
Red/Blue Alternate | Armed | AC Power OK, Battery Trouble |
Red Blinking | Armed | AC Power Trouble, Battery OK |
Interactive Shield
On Touchscreen Keypads, press the shield to display your arming options. Disarm your system by pressing the shield and entering your user code.
Carousel Menu
On the 5-Inch Touchscreen Keypad, use the navigation arrows to scroll through the Carousel menu options. On the 7-Inch Touchscreen Keypad, press and drag to scroll through the Carousel menu options.
Carousel Menu Options for 5-Inch and 7-Inch Touchscreen Keypads | |
|---|---|
Panic | Press Police, Emergency, or Fire to send a panic report to the emergency monitoring station. |
Chime | Press Chime to turn the chime feature on and off. If chime is on, the keypad will sound an alert and display a notification when external doors and windows (with sensors installed) are opened. |
Reset | Press Reset to reset fire and panic sensors after they have triggered an alarm or after replacing batteries for wireless sensors. |
Favorites | Favorites displays a list of your Z-Wave favorites. Press a Favorite to activate it. |
Options | Press Options to display the Setting Options screen. From here, you can adjust the keypad screen brightness, tone, and volume. You can also choose what you want to display in the carousel menu. |
Keypad | Press Keypad to display a standard DMP keypad. Use this option to access the User Menu. See Type On Your Keypad for more information. |
User Codes | Press User Codes to add, edit, or delete user codes in your system. |
Schedules | Press Schedules to add, edit, or delete schedules. You can also use it to assign schedules to outputs and favorites, as well as auto-arming and auto-disarming. |
Events (5-Inch Only) | Press Events on a 5-Inch Touchscreen Keypad to view up to 12,000 past panel events that occurred on your system over the last 45 days. |
Events (7-Inch Only) | Press Events on a 7-Inch Touchscreen Keypad to view a combined events list from Virtual Keypad on your keypad. |
Thermostats | Press Thermostats to display the Z-Wave thermostats screen. From here, you can adjust the temperature or select ON, OFF, HEAT, COOL, or FAN. |
Doors | Press Doors to lock or unlock Z-Wave locks. You can also open and close Z-Wave-equipped |
Lights | Press Lights to turn ON, turn OFF, or DIM Z-Wave lights. |
Appliances (7-Inch Only) | Press Appliances to display the Z-Wave appliances screen. From here, you can turn appliances on or off with the multilevel slider that displays. |
Doorbell (7-Inch Only) | Press Doorbell to display a live view of all DMP Model V-4061DB Video Doorbell’s on the local network. |
Video (7-Inch Only) | Press Video to display a live view of all system cameras on the local network. |
System Status Icons
System status icons for Touchscreen Keypads are located at the top of your home screen. The following icons indicate the status of your system:
System Ready to Arm
The check mark indicates that your system is ready to arm. If you don’t see the check mark, a door or window may be open.
Attention List
When pressed, the attention list icon displays the type of event or trouble message your system has recorded. It also shows the name and number of any affected zones.
Battery Trouble
If you see this icon, your system’s battery is low or disconnected.
Chime On
This icon means your chime is turned on. A tone will sound each time a door or window is opened. You can activate this feature in the Chime section of the user menu.
AC Power Trouble
If you see this icon, your system isn’t receiving AC power.
Wi-Fi Connection
If you see this icon, your system is connected to a Wi-Fi network.
